Local build
Prerequisites
You must have the Windows Build Support (IL2CPP) module installed in order to compile locally. You can ensure this module is installed using the Unity Hub application:
Installing IL2CPP
Open the Unity Hub application, Select the Installs option from the list on the left side of the Unity Hub application, In the list of Installs on the right, locate the entry with the heading 2020.3.33f1, Click the gear icon (highlighted in orange in the screenshot below)


A context menu will appear, from which you should select the Add Modules option.


If the Add Modules option does not appear in this context menu, please quit the Unity Hub application then reopen it and try again. By default, Unity Hub will continue running in the background when you close the Unity Hub window. In order to completely quit the application, look in the Windows System Tray (icons on the taskbar near the clock) for the Unity Hub icon (a stylized cube), then right click that icon and select Quit Unity Hub from the context menu.
A list of additional modules that can be installed for Unity should appear. Scroll down the list until you locate the module Windows Build Support (IL2CPP). If this module is already installed, the word Installed will appear to the right of the module name, and you can exit the Add modules… dialog. Otherwise there will be an empty check box to the left of the module name. Check this box (as shown in the screenshot below), then click the blue Continue button and wait for the module installation to complete.


Building Locally
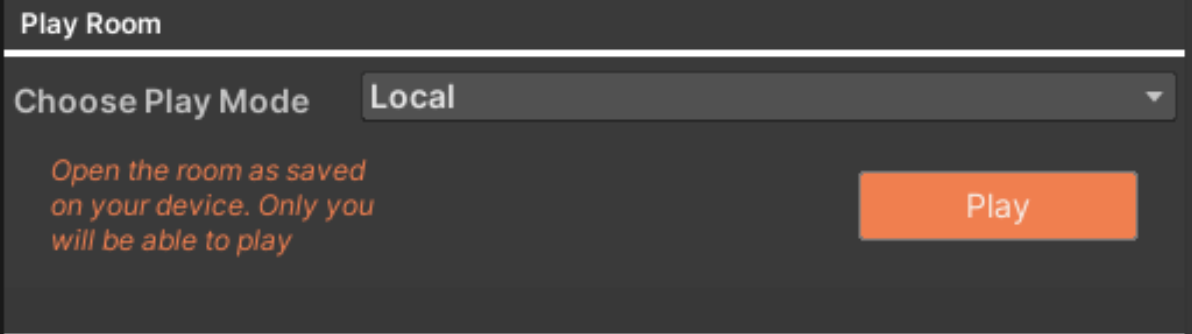
“Local” refers to playing your Rec Room Studio room within the Rec Room Client you installed with Rec Room Studio- on the same computer you’re running Unity! When the play mode is set to Local, clicking on the Play button will launch Rec Room on your computer. Then it will send you to the latest version of your room on your computer. When in Local Play mode, select “Send to Studio” to save changes you make with the Maker Pen to the room.
If you want to try out your work, but you’re not ready to build your room and save your changes on RecNet, then you’ll want to use the “Play Room” options located within the Rec Room Studio menu.
If Rec Room is not open, You will be promted to lanuch it.
To test in VR, Open the Rec Room Client in VR before building